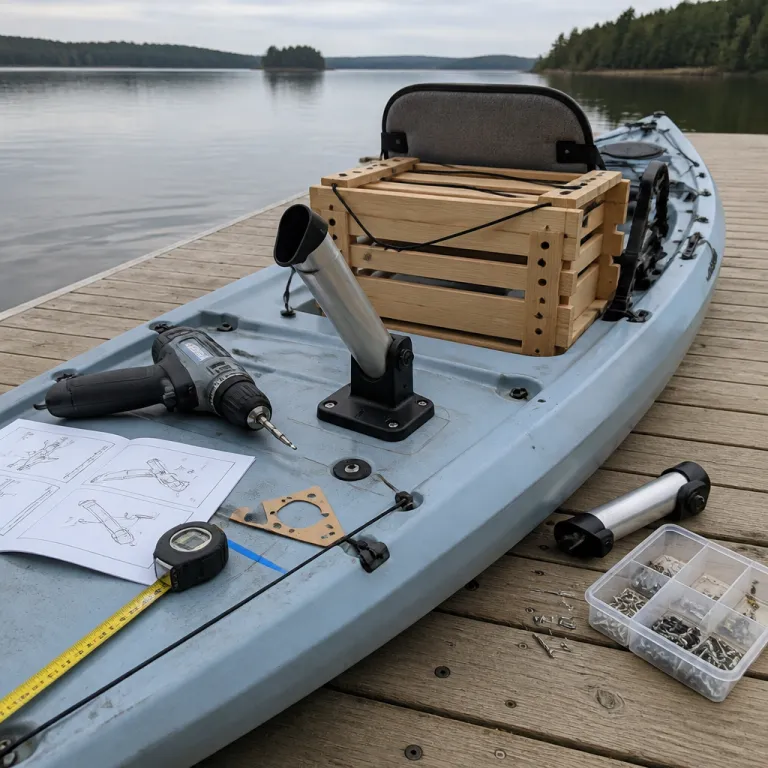
Dialing in the essentials on a fishing kayak
A stable kayak means nothing if your fishing setup and rigging accessories are a mess. When you turn a bare hull into a fishing kayak, focus first on three essentials that quietly handle ninety percent of real days on the water. A solid rod holder system, a simple crate, and one reliable paddle leash will serve you better than a deck buried in shiny items you never touch.
Start with rod holders before any other fishing accessories, because rod control keeps you from losing both tackle and fish. Flush mount rod holders behind the kayak seat look clean and low profile, yet they lock your rod tube angle and are harder to adjust when wind or current shifts. Track mount rod holders on factory gear tracks give more options, letting you slide and rotate each holder until your paddle stroke clears and your line runs clean past the bow.
If your fishing kayak came without tracks, you face the classic drill and mount decision that every angler eventually meets. Many Wilderness Systems style hulls include gear tracks from the factory, while older kayak canoe hybrids often need you to add your own track rails with stainless hardware and sealant. When you drill, keep holes above the waterline, use marine sealant generously, and remember that the best product choice is the one that still feels right when you are three kilometres from the ramp in a rising wind.
A basic crate behind the kayak seat turns dead space into a control centre. I have run everything from a milk crate zip tied to a cheap cart frame, up to a purpose built box with integrated rod holders and a tool holder for pliers and braid scissors. The price matters less than how quickly you can reach lures, a dry bag, and spare kayak paddle blades without twisting your back while the kayak rocks under you.
Keep your first rigging pass light, then add accessories only after a few trips. One or two rod holders, a crate, and a clipped on dry bag for phone and keys will already feel like a serious kayak upgrade over a bare hull. The anglers who rig slow and test often usually end up with the best layouts, while the ones who bolt on every product from an online cart in one night spend the next month moving hardware and cursing extra holes.
Gear tracks, drilling, and mounting rods where they actually work
Factory gear tracks changed how we think about kayak fishing accessories and rigging, but they did not remove the need for a drill. On a modern fishing kayak with bow to stern tracks, you can slide a rod holder, tool holder, or camera mount anywhere along the rail until it clears your paddle and casting stroke. Older hulls without tracks force you to choose between permanent mounts and creative clamp on options that rarely hold up to hard fishing.
When you do have tracks, start with a single adjustable track mount rod holder on each side, then fish a full day before adding more. Place the primary holder just ahead of your knee on the off paddle side, so you can grab the rod without leaning or banging the kayak paddle on graphite. Secondary rod holders can sit behind the kayak seat for storage, angled slightly outboard so rod tips clear trees and docks when you slide past town bridge pilings or low hanging limbs.
On bare hulls, drilling for a fixed mount can be the right call if you plan carefully. I have drilled through the gunwale of a budget kayak canoe combo to install a pair of low profile rod holders that never moved again, and the payoff was clean trolling passes for walleye on a deep reservoir. The key is to mock up every product position with tape first, sit in the kayak on dry land, and run a full paddle stroke while pretending to fight a fish before you ever touch a drill.
Electronics bring another layer of mounting choices, especially when you add a fish finder like a Humminbird Helix to a small deck. Side mount swing arms let you drop the transducer over the side of the kayak, while through hull mounts keep everything tucked and snag free but require more holes and careful sealing. If you are pairing a Helix with a mid priced reel chosen using a solid guide on how to choose fishing reels for big fish with confidence and control, make sure the screen sits close enough that you can read depth and structure without twisting your spine every thirty seconds.
Whatever mount style you choose, treat every hole in the hull like a permanent decision. Use stainless hardware, back it with washers, and seal each bolt so your dry storage stays truly dry even when waves wash over the bow. A fishing kayak that stays dry inside, carries rods where you can reach them, and keeps the kayak paddle path clear will always fish better than a deck crowded with accessories fishing fans brag about online but rarely use twice.

Crate systems, milk crates, and managing tackle without sinking the stern
The humble crate is the unsung hero of kayak fishing storage and rigging, and it is where most weekend anglers either nail their system or create chaos. A simple milk crate lashed behind the kayak seat can hold multiple boxes, a dry bag, and two or three rod holders without costing more than a fast food lunch. Purpose built kayak crates from brands that echo Wilderness Systems styling add lids, hinges, and track mount feet, but the basic job stays the same.
My favourite budget setup uses a standard crate, four bolt on rod tubes, and a side mounted tool holder for pliers and line cutters. Zip ties and stainless bolts secure the rod tubes so they angle slightly outboard, keeping reels away from paddle drips and leaving space for a vertical rod holder on each side rail. Inside the crate, I stack three shallow tackle boxes, one small dry bag for phone and wallet, and a mesh pouch with terminal tackle items that would otherwise rattle around the hull.
Weight distribution matters more than fancy product features when you load that crate. Keep heavy lead, big lures, and spare anchor gear low in the crate, then add lighter fishing accessories like soft plastics and floats toward the top. If you run a dedicated kayak anchor system such as an Anchor Wizard style reel, mount the reel body on the gunwale and stash only the rope tail in the crate so you do not pile too much mass behind the stern handle.
Rod management around the crate deserves the same care you give your favourite spinning rod chosen from a guide on how to choose top rated inshore spinning rods for serious coastal fishing. Use the crate rod holders for storage rods and keep your working rod in a forward mount where you can grab it instantly when a fish blows up on a point. On small lakes outside town, I often carry three rods in the crate rod holders and one in a forward track mount, which covers finesse, power, and a reaction bait without turning the kayak into a porcupine.
Do not forget quick access safety items when you dial in the crate layout. A compact first aid kit, a spare dry bag with a thin base layer, and a whistle or light should all live where you can reach them without unbuckling the kayak seat. The best crate systems feel invisible on the water, letting you focus on current seams and weed lines instead of digging for gear while the kayak drifts sideways past the spot that should have produced your fish of the day.
Anchors, trolleys, and staying put when the wind wants you gone
Most new kayak anglers obsess over the anchor itself and ignore the trolley, which is backwards. On a small fishing kayak, the anchor trolley is the real control system, because it lets you slide the anchor point from bow to stern and change how the hull faces wind or current. A cheap anchor without a trolley will spin you broadside, while a modest kayak anchor paired with a smooth trolley can hold you nose into a breeze all afternoon.
Think of the trolley as a sliding mount that runs along the side of the kayak, guided by pulleys at bow and stern. Clip your anchor line to the trolley ring, then pull the line forward or back until the kayak points the way you want for casting or jigging. In shallow rivers outside town, I often set the anchor near midship, then slide the trolley ring toward the bow so the kayak settles nose upstream while I work a jig for smallmouth fish along the seam.
Systems like Anchor Wizard style reels make anchor handling easier by letting you raise and lower the anchor from the kayak seat with a crank. Mount the reel body within easy reach, but keep it low profile so your paddle stroke and rod sweep do not bang into the housing. Run the anchor line through the trolley ring, not directly off the reel, so you still gain the full benefit of sliding the anchor point along the hull.
Weight and storage for anchor gear tie back into your overall kayak fishing rigging plan. A small folding anchor, ten to fifteen metres of rope, and a short chain section will usually cover lakes and slow rivers without overloading the stern with heavy items. Store the rope in a ventilated bag or crate corner so it dries between trips, keeping your dry compartments actually dry and your fishing accessories free from mildew.
Always test anchor and trolley function on a calm day before trusting them in stronger wind or current. Practice sliding the trolley, raising the kayak anchor, and clearing the line from under rod holders or the kayak paddle while you sit in the driveway or at a quiet launch. The best anchor setup is the one you can operate by feel when a surprise gust hits just as a big fish pulls you toward a laydown.
Electronics, cable management, and avoiding the overloaded kayak
Electronics can turn a simple kayak into a serious fishing platform, but they also create clutter if you rush the install. A compact fish finder such as a Humminbird Helix unit, a small battery, and a clean cable run will show you depth, structure, and bait without turning the deck into a wiring project. The goal is a low profile layout that keeps cables off the floor, away from your feet, and out of the way of rods and the kayak paddle.
Start by choosing a mount location for the screen that you can see while seated without twisting, usually just forward of your knee on the non casting side. Use a track mount base if your fishing kayak has factory rails, or a small fixed mount plate if it does not, then route the power and transducer cables along the inner hull using adhesive pads and zip ties. Where cables pass through the hull, use waterproof glands and sealant so your supposedly dry storage stays dry even when waves or rain wash over the bow.
Battery placement is another place where kayak fishing accessories can quietly ruin stability if you get careless. A small sealed battery in a dry bag under the kayak seat keeps weight low and central, while a big battery and box stacked behind the crate can make the stern squat and the bow wander in wind. Before you commit, load the kayak with every product you plan to carry, from electronics to anchor gear, then push it off in shallow water and feel how it trims when you shift your weight or fight a fish.
Cable management also intersects with safety and conservation, especially when you run stainless leaders or heavy wire for toothy species. A good primer on why stainless steel fishing wire matters for serious recreational anglers will remind you that loose wire and line on deck can tangle feet, snag rod holders, and end up in the water where it threatens wildlife. Keep cutters in a tool holder within reach, trim tag ends short, and stash all spare wire or line in sealed containers so nothing blows overboard when a gust hits.
The last mistake many new kayak anglers make is simply adding too many accessories too fast. Every extra mount, crate, dry bag, and gadget raises weight, cost, and complexity, while your actual fishing time stays the same. Rig light, test often, and remember that the real measure of any setup is not the spec sheet, but the tenth cast in the rain when everything still works and you are thinking about the next bite instead of the next bolt.
FAQ
How many rod holders do I really need on a fishing kayak ?
Most recreational anglers do well with three to four rod holders on a fishing kayak. Two forward holders for active rods and one or two behind the kayak seat for storage usually cover multiple techniques without clutter. Add more only if you routinely fish with extra rods and have already confirmed that paddle clearance and casting lanes stay clean.
Where should I mount my fish finder on a small kayak ?
Mount the fish finder screen where you can see it without twisting, typically just ahead of your knee on the non casting side. Use a track mount if available so you can fine tune the angle and distance after a few trips. Keep cables routed along the hull edges and through sealed glands so your deck stays open and your dry storage remains dry.
Is a crate system better than built in storage for kayak fishing ?
A crate system behind the seat is usually more flexible than built in wells for kayak fishing. Crates let you reconfigure rod holders, tackle boxes, and dry bag placement as your style changes or you add new fishing accessories. Built in storage is cleaner, but it rarely matches the modular options and quick access of a well rigged crate.
Do I need an anchor trolley, or will a simple anchor rope work ?
A simple anchor rope will hold you in place, but an anchor trolley lets you control how the kayak faces wind and current. Sliding the attachment point from bow to stern changes your orientation, which affects casting angles and safety in waves. For most anglers, a basic trolley is one of the highest value kayak fishing rigging accessories they can add.
How do I avoid overloading one side of my fishing kayak ?
Balance heavy items like batteries, anchor gear, and full tackle boxes along the centreline whenever possible. When you must mount a product on one side, counter it with lighter accessories on the opposite side and test the trim in shallow water. If the kayak lists noticeably when you sit still or lean to fight a fish, move weight toward the middle until it feels neutral again.